Last Updated on 28-Mar-2023 by Charles Maxwell
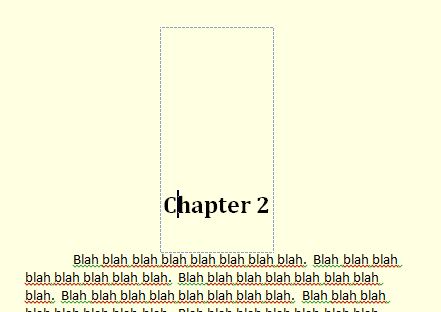
Many times when preparing a book or a long report, you will want a major heading (such as a chapter heading) to be positioned part of the way down the page, such as the following:

With Microsoft Word (2010, 2013, 2016, 2019, and perhaps other versions), this is difficult to do if you do not know the trick discussed in this article. It is difficult, because MS Word suppresses the “Paragraph Spacing Before” command when a heading falls at the top of a new page other than on the first page of a document or a new section. However, with the following technique you can overcome this limitation.
Here is how to do it:
- On the Home tab, go to the Styles group.
- Right click on the desired Heading style (for example Heading 1), and select Modify.
- Click on Format (in the lower left corner), and select Paragraph, and set the Spacing Before and Spacing After as desired. Then click OK.
- Click on Format again, and select Frame, and set the Text Wrapping to None. Also set the desired Horizontal Position (for example to Center, as in the illustration shown in this article). Then click OK.
Now your headers will position themselves down the page as desired.
You can tell that a text frame is in place when you click on any of the headings and see the frame drawn with tiny, blue, dashed lines, as shown below.

Here are the settings for the chapter heading example shown in this article:
- Font: Cambria 18 pt, Bold
- Horizontal Position: Centered
- Space Before: 120 pt
- Space After: 24 pt
- Other: Keep with next, Keep lines together
- Level: 1
- Frame Position: Horizontal center
For this technique, I am indebted to Dario de Judicibus’s digital magazine L’Indipendente:
Admin, “How to add space before a heading in Word 2013 and 2016,” L’Indipendente (ISSN 1824-8950), 24 Nov 2015, https://www.lindipendente.eu/wp/en/2015/11/27/come-aggiungere-spazio-prima-di-unintestazione-in-word-2013-e-2016/, accessed 9 Apr 2020.